|
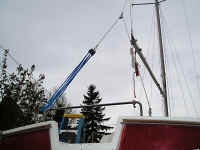
The boom hung: a view of the new adjustable
backstay. (May 9, 2004)
--
MORE DETAILS HERE -- |
|
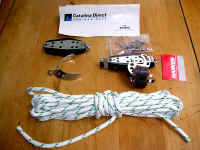
What's missing in this picture?
Today, I opened the Catalina Direct
Boom Vang Kit to begin installing -- but what a surprise (!) -- there
were no instructions as usual. (May 9, 2004)
Answer: Instructions!
Adding a Boom Vang Project
|

|
Yesterday's (May 15, 2004) project was
to attach the swim ladder. After determining where it would be mounted,
I decided to remove the boat's name (photo on left is prior to attempt) -- which would be covered by the
ladder's mounting brackets and the ladder when deployed. After trying to
compound off the name with a polisher, I decided to cut-corners and
resorted to the old stand-by I've used many times, Easy-Off Oven
Cleaner. The problems began ... |
|
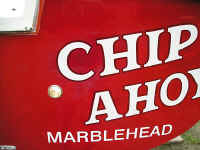
The oven cleaner began
discoloring the hull, most noticeably around the "C" which I
had nearly compounded off and where I'd applied it the heaviest. I
quickly wiped it off and hosed down the transom. I tried using a little
acetone to attempt removing the discoloration, and that only made
matters worse. Ultimately, I relettered the name on the transom
just to better cover the discoloration (photo on left). I'll bolt the swim
ladder over it after all. |
|
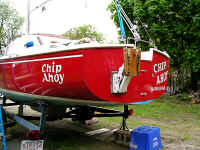
Today, I finished up the lettering and
am finally ready to mount the swim ladder. It's amazing that a former
sign-painter apparently never loses his touch: I just opened the old
cans of One Shot lettering enamel, picked out a lettering brush, and was right back there as if over a
decade hadn't passed! (May 16, 2004) |
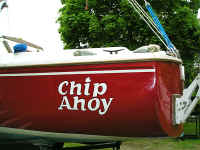
|
This time, I lettered the name using
the logo style from a package of "Chips Ahoy!" cookies. I got
the idea from one of my crew last summer who brought a package aboard
and advised that I never sail without one as a talisman. This one-ups
Jack's recommendation! |

|
Finishing up the outline on the
starboard side's name. (May 17, 2004) |

|
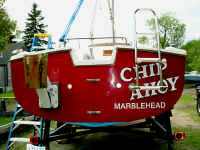
Today I finally got to install the
swim ladder -- another project that ultimately took about an hour or
two, after spending the weekend wresting with attempting to remove then relettering the name (see above). I measured over from the rudder
gudgeons and drew a vertical line, then aligned the ladder with it,
keeping the ladder as low and starboard as possible while still keeping
the ladder's padded feet on the transom (per the instructions
Catalina Direct included in this kit!). Then I held up the ladder and
marked the fastening holes on both sides of the ladder. |
|
Once I got those marks, I removed the
center-side ladder stanchion, lined up the holes and drilled them
through the transom. I tried the screws and they fit perfectly, so I
sealed the stanchion with 3M 4200 then threaded the screws through it
and the transom. |
|
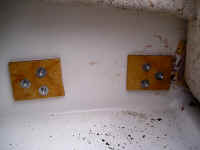
On the inside cockpit side, I sealed
the 3/8" plywood backing plate (that I'd epoxied yesterday and
drilled out this morning, again using the stanchions as a template) with
3M 4200, fed the screws through the pre-drilled holes, and fastened the
nuts over the lock and fender washers provided with the kit. Once the
center stanchion was fastened, I hung the ladder and repeated the
process for the outboard side.... (continued) |
| NEXT |
| It's never-ending ...
but spring is in the air at last, the projects have begun! |