|
|

Chip Ford's 1974 Catalina 22
Restoration Project
Sail #3282 l Marblehead, Massachusetts |
|
The never-ending project to fill my hole in
the ocean while bailing it out
Sailing Season 2012 preparations begin!
- Commissioning 2012 -
Page 1
|
| Click
thumbnails for a larger picture |
 |
There was little to do
over the winter this year ― refinishing the tiller was all I could come
up with for an inside "project," if it can be called one. Last spring I
just touched up some minor dings and scratches with a little Cetol, so
decided it was time to sand the tiller down and refinish it again. (Feb.
25, 2012) |
 |
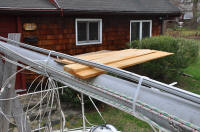 |
With Chip Ahoy uncovered
last week,
I spotted the slightly bent roller-furler extrusion, remembered it
needed to be straightened from
connecting
with a tree branch after Hurricane Irene last fall. With the thick
nylon zip-ties, applied by the boatyard at haul-out, strapping the foil
stongly against the mast, I hammered in some wedge-shaped cedar shingles
between until it looked pretty straight again. (Mar. 24, 2012)
|
 |
 |
Today I started on the forward deck projects.
Since I'm going to replace the hatch's weatherstripping, I decided to
remove the hatch entirely and eliminate a minor annoyance with a coat of
paint or two on the hatch's interior bottom. (Apr. 7, 2012)
—
FURTHER DETAILS
—
|
 |
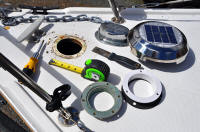 |
The other forward deck project is to remove the old and
non-functional Nicro 24-hour day/night solar vent and replace it with a
new one. Removing the old deck pipe trim ring was necessary as the "new
and improved" Day/Night-Plus Vent mounts differently. It will no longer
be easily removable, and naturally, it has a different holes pattern.
Today I filled the six old screw holes in the deck with epoxy, sanded
and epoxied the pipe hole's edges while I had access. (Apr. 7,
2012)
|
 |
 |
Today I got the base plate and its rubber gasket bedded and sealed
with silicone, then loosely screwed it into the deck until the sealer
sets up. I temporarily covered the pipe with the vent, in case of rain.
Tomorrow I'll tighten down the base plate into the bedding compound,
remount and permanently screw down the vent, and be done. (Apr. 9,
2012)
|
 |
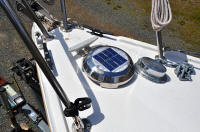 |
The new solar vent installed. Now I'll get back to the forward hatch
resealing job. I've been real lucky so far — days, even weeks with
no rain and comfortable spring temperatures early. Beyond a record warm
winter with negligible snowfall, apparently we might even dodge monsoon season
this year! (Apr. 10, 2012) |
 |
 |
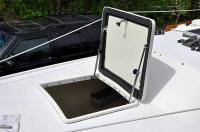
I reinstalled the forward hatch today, with its new seal.
One more small project completed. (Apr. 19, 2012) |
 |
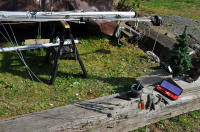 |
After problems turning and loosening the turnbuckles at the end of last
season, I removed them all, wired-brushed their threads clean, then
greased each. I had real difficulty trying to even budge one without bending or
breaking it. I resorted to using high heat from my handy little multi-purpose
Weller Portasol P2KC butane soldering tool with its flaming blue
heat tip to break the threads free from the turnbuckle.
The starboard-side aft-lower shroud has a broken wire strand at its top
crimp, so I'm replacing it. (Apr. 21, 2012) |
 |
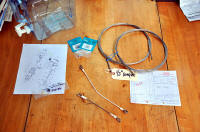 |
With the new jib pennant I made at West Marine, 1-1/2" longer than the
swaged cable I had on hand and used doubled on itself last season, the
new lower shroud I had The Forepeak make up half an inch longer, and the replacement nylon
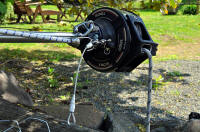
grease-fitting screw I got over the winter from Furlex, I finished up
the mast today. Extracting the broken grease-fitting screw went as easy
as I'd expected, which is unusual. I greased the furler drum, sprayed
WD40 on all the rigging blocks, Sail Kote in the sail slug channel.
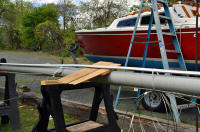
I was disappointed when I removed the the cedar wedges (see above)
from the furler extrusion: not much improvement. After sliding the zip-ties further apart I hammered an additional piece of plywood and the
wedges back in. I may have to live with a slightly bent foil.
(Apr. 26, 2012) |
 |
 |
 |
|
NEXT |
|
It's never-ending ... onward to Sailing Season 2012! |

| |

|
|