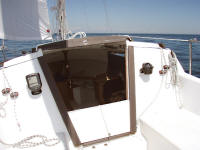
 |
A
few years ago I installed a Humminbird Piranha Max 15 with a puck
transducer in the bow. It worked fine -- until last
season's lightning strike. During last year's Cape Cod cruise, it
started going buggy: sometimes showing 800 feet of water where I
knew there was 100; 3 feet when I knew I was in 40. A depth
sounder, aka "fishfinder," is useful to me not only to know the depth so
I don't run aground, but in navigation -- knowing the depth of the water
and how it correlates with the charted depth. I don't need to know
if there are fish below, or what the ocean's bottom looks like, even
what the water temperature is, but it
did that too. My unit had become extremely unpredictable --
therefore useless, even dangerous. (May 5, 2007) |
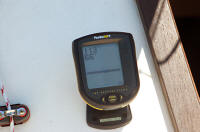 |
It was a bit of a nuisance remounting and
unmounting the Max 15 each
time I used my boat: The connections at its back-end were
difficult to connect due to the shortness of the wiring plugs and
tightness of space behind it. But it was too easily removable by
"unauthorized" boarders, especially with my boat unattended out on its
mooring for most of the time; too tempting. So I'd remove it when
done sailing, remount it when I got back out to the boat.
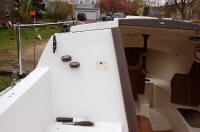
Unfortunately, it also took over the only place to lean back in the
cockpit against the bulkhead -- the compass sticks out on the starboard side
(see photo above). |
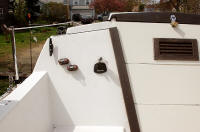 |
Since installing the
rope clutches,
eventually I'll be able to remove the cam cleats on the bulkhead. So I chose a
Hummingbird HDR 610 depth gauge, which will mount flush with the
bulkhead. Yesterday's project was to remove the old "fishfinder"
mounting bracket, its puck transducer, and the wiring and cable -- then replace it with the new depth gauge and
puck transducer, rewire it. |
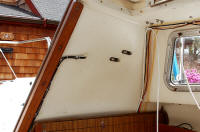 |
The power and transducer cables run up alongside the
cribboard finish trim, then over and out into the cockpit. I'd
drilled a ½" hole through the bulkhead when I
installed the fishfinder, then had filled it with 3M 4200. Getting
that old bedding compound out so the connector plugs would pass back through was more
time-consuming than I'd anticipated (there is zero tolerance}, but with
perseverance it was accomplished. I removed the
old transducer and
its cable then ran the new cable aft. (see
details below) Done with that, I epoxied the new transducer in place
in the bow and
left a block of granite on it overnight to secure it to the inside of
the hull as the special slow-drying epoxy that came with the gauge
cured. |
 |
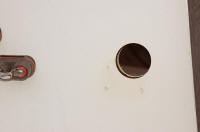
With the cabling and plugs removed, first I wet-sanded
the gelcoat beneath the old fishfinder mounting bracket as best I could using
1000 then 1200
grit: It'll never be a perfect match, as it was protected by the
mount, but the result was a big improvement. Then I filled the screw holes with West System epoxy resin
mixed with a little colloidal silica and a touch of white tint. |
 |
Finally, I used the 2⅛" hole saw I'd
borrowed from the boatyard and cut a hole for the new depth gauge.
I tested the fit, which was fine if a little loose. With the hole cut, I mixed another batch of epoxy resin and "painted"
the plywood core sandwiched between the exterior and interior fiberglass. The epoxy filling the screw holes
still needs to be sanded smooth with the bulkhead, but as the day was
ending and I had questions about the new unit's connections and power
supply (and an on/off control), I taped up
the hole for the night and called it a day. (Note how less
noticeable the gelcoat discoloration/oxidation is when your eye is drawn away.
This works the same when removing old boat names from a transom!) |
 |
This morning began "unseasonably cold" (in the low 40s)
so I didn't get back out on the boat until after noon. The tape
had to be removed, the epoxy sanded, before I could move on. (May
6, 2007) |
 |
Once the tape was removed, I sanded the epoxy patches
over the old screw holes with 320 grit, then wet-sanded the area again
with 1000, then 1200. It was as good as it was going to get. |
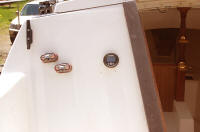 |
From there, I put a thin bead of 3M 4200 around the hole
and pushed the new Humminbird HDR 610 into its new home.
|
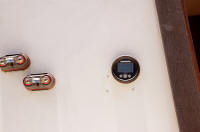 |
It's looking good so far. |
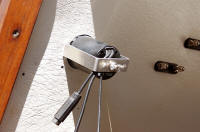 |
On the backside, in the cabin, I finger-tightened the
wing-nut: I'll tighten it up more tomorrow, after the bedding
compound has had a chance to cure. |
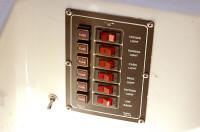 |
The confusion over whether there is an on/off button
on the unit stalled me yesterday. (Apparently this
model doesn't have one, according to folks in the discussion group and
from my weekend research.) In the end, I added a
toggle switch (bottom left in the photo). It took drilling a ½"
hole for the
toggle switch. Now I can wire up the depth gauge and its
fuse, plug in
the transducer cable, attach the alarm buzzer, and be done. |
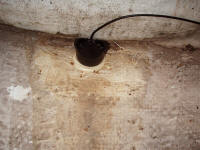 |
Detail: I removed the
old puck transducer
beneath the aft v-berth compartment, against the cabin bulkhead, then replaced
it with the new one. I used a beveled putty knife to scrape off
the old epoxy down to the fiberglass hull, then acetone to clean the
spot again. Once it was clean and dry, I used the package of
slow-drying epoxy that came in the Humminbird package and buried the
transducer into it, twisting slowly back and forth as I worked it in. |
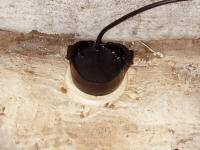 |
After moving the cable out of the way, I placed a
granite
block on top of the transducer overnight, until the puck was securely
embedded. The next day I plastic-tied it to other cables running
aft alongside it to keep things neat. |
| Moving on
with Season 2007 improvements |
|
It's never-ending ...
but spring has arrived and Sailing Season '07 is in sight |