 |
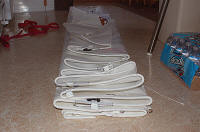
My new Ullman Offshore full-battened,
loose-footed mainsail arrived from
Catalina Direct a few days ago. I finally got around to taking it
out of its box, then its new sail-bag and laying it out on the kitchen
floor (it's getting crowded in the house, with everything from the boat
now in here for the winter). (Nov. 10, 2007) |
 |
In a casual inspection, everything seems to be
as-ordered: The sail numbers are correct (3282), the two sets of reef
points ordered are there. |
 |
Ideally, I'd like to spread it out, look over the sail as
a whole -- see more of the details. But that's not going to happen
for a few months to come, so I did the best that I could. I was
going to wait until spring to inspect it, but this morning on the
discussion group, Jay Holz ("CjAndeai") advised: "Open that new sail!
Check it out good now before the sailing season, just in case there's a
problem." I thought that was smart advice, even if my capability
is presently limited, considering my usual luck getting the one bad
piece from a lot. |
 |
Jay added: ". . . many of us need to know what your
first impressions are." My first impression is -- quality and good
workmanship. The little details I inspected were stitching and
reinforcements: They both look very well done. Configuration --
how it'll fit on Chip Ahoy's mast and boom -- will have to wait until
spring. |
 |
From everything I was able to eyeball
as I carefully unfolded the sail in limited space, this looks like a
quality sail -- and what a difference in stiffness from my old (original
with the boat) mainsail. I'm anxious to try this "loose-footed"
concept -- entirely new to my experience. |
 |
As with the rest of the workmanship, the headboard seems to be attached quite securely and
provides everything I'll need. All and all -- upon this cursory
kitchen floor inspection -- I love it so far, am satisfied that I got
what I ordered. Come spring and raising it up the mast will be the
next test. Sail in bag is now stored away in the closet until
then. |
 |
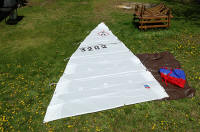
I unbagged and spread out the new mainsail today, my
first look at it in its entirety. I inserted the battens just to
make sure they'd fit properly before I try hoisting it for the first
time. The two sets of reef points are there, the numbers are
correct; everything looks just fine, ready to go. (I finally
uncovered the picnic table and chairs today as well, at last.) (May 11, 2008) |
 |
Today I went out to Chip Ahoy
on its mooring to attempt
getting the mainsail to fit without the roach hitting and rubbing the backstay. Wally
and I noticed this problem when rigging the boat on Monday for
launching. We removed
the third batten down from the head of the sail to keep it from hanging
up on the backstay. At that time, it appeared to be the only
problem area. That evening I lowered the boom from 3 feet 6 inches
by about 4
inches but hadn't raised the mainsail since. My plan was to raise
it and see if that
4" adjustment would allow the sail to swing clear. If it worked, I would be on
my way out for the first sail of the season on the opening day of a heat wave.
(Jun. 7, 2008) |
 |
The mainsail isn't hauled quite all the way to the top of the mast,
yet still the roach in the leech is hitting -- not just at the third batten down but at
the second down as well, and touching the top batten. On Monday
I'd lowered the boom by about 4" to where its top was now about 3 feet 2 inches above the mast step.
It's needs to be lowered considerably more. |
 |
A view of the problem from the port side.
At a minimum, without more adjustment the edge of the roach isn't going
to last long without wearing through the batten pockets.
Worst-case scenario: An unexpected gybe I think could potentially
take out the backstay and bring down the mast. |
 |
When we prepared to fasten and mount the new boomkicker
on Monday,
first the boom was hung. I used measurements based on
instructions provided by its manufacturer, Seoladair Ltd., as well as
additional tips and advice from other C22 owners' websites, to drill and
tap the three holes in the boom's bottom for the kicker's top bracket. When we attached
everything all looked fine, as it was supposed to look. The problem
now seems to be that the boom is too high even based on the measurements
we used: Boom height, 3' 6" -- boomkicker bracket 10" above the
mast step. |
 |
I lowered the boom but doing that overly bent the fiberglass
rods on the boomkicker. The increased angle caused the vang's block to rub against
the front edge of the solar panel. When I had this problem
previously, I cured it by
adding a shackle
between the vang's block and the mast step plate. |
|
-- Cont'd on Page 2 -- |
| Moving on
with Season 2008 improvements |
|
It's never-ending ...
but Sailing Season '08 is ahead and coming! |