|
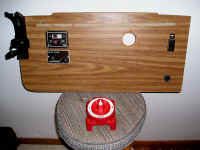
I decided, before I launch for the
season, that I want a second (back-up) battery for my planned month
cruising up the coast of Maine. The first step was to mount the
four-way battery switch. My first thought was to drill the 3-5/8"
hole in the fiberglass cabin liner bulkhead just below the step into the cockpit,
but at the suggestion of Dick King I decided to save the fiberglass and
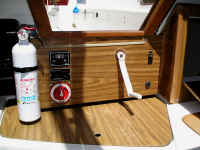
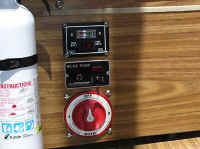
mount the switch on the keel winch handle panel just below the bilge
pump switch and dual-battery volt meter. (June 4) |
|
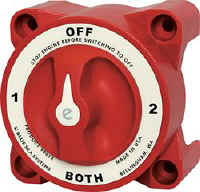
The Blue Sea Systems Compact 4-Way Battery
Switch
(Model 9001e) at left will connect the two batteries:
Battery One: An Exide-Nautilus Group 27,
Dual-Purpose Deep Cycle & Marine Starting - 95 Amp/Hrs., 700 MCA* - 160
Mins. Reserve; Battery Two:
A Seahawk Group 24, Dual-Purpose Deep Cycle & Marine Starting -
65 Amp/Hrs., 650 MCA* - 120 Mins. Reserve.
*MCA = Marine Cranking Amps |
|
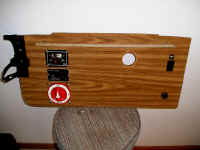
This morning I used a 3-1/2" hole
saw (the closest size to 3-5/8" I had available) to cut the hole,
then a half-round file to finish it off to perfect size. My concern that
it would protrude too far inviting guests to kick or trip over it was
unfounded; counting the knob it sticks out only an inch from the panel
face, no more than the bilge pump toggle switch above it.
Good thinking Dick, it was a perfect fit! |

|
The next steps are to mount the second
battery, then begin wrestling with the wiring project. |

|
The backside of the winch handle panel
with the 4-way switch wired up to the dual-switch voltmeter. |
|
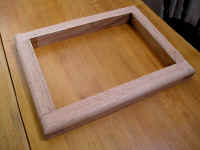
I had the boatyard build an oak frame to
secure the second battery. After taking this shot I cut and sanded a bit
to fit the battery box into it (see pencil marks) then coated it with
epoxy. Tomorrow I'll
secure it in the starboard bilge roughly opposite the primary battery, insert
the new battery box and Seahawk dual-purpose 650 Group 24 battery, then begin
the wiring. |

|
The new battery box and frame are ready to install.
(June 5) |

|
The battery box frame secured with
epoxy and West System's collodial silica. |
|
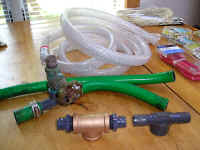
While installing the new starboard-side battery and box, I eliminated the
hose coming from the sink drain
and its shut-off valve (center). I'd removed the sliding galley last
year and the extraneous hose was only in the way (and a needless
potential leak). I recalled that last year when I replaced the gate
valve behind the "volcano," the nylon t-fitting (bottom right)
developed a hairline crack from over-tightening on the gate valve.
I'd epoxied then banded it with a hose clamp, but decided now was the
time to replace it (bottom left) along with the hoses and clamps as
well. (June 8) |
|
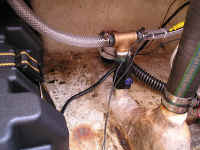
At the suggestion of Bob "Hobie"
Davidson on the C22 discussion group list some time back, I replaced the cockpit
drain hoses with clear reinforced hose; better to see if they get
clogged and what's clogging them. The area around the battery box is now
less cluttered without the unnecessary sink drain and shut-off valve.
The brass t-fitting didn't crack when I tightened it this time! |
|
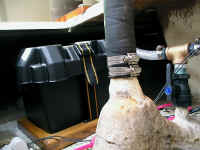
The new battery and box installed.
(I later added a
small solar panel to keep
the batteries topped off especially while on the mooring, and my 9.9 hp
Tohatsu outboard has an alternator that charges either/both batteries
when running.) |
|
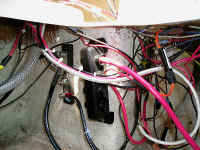
I mounted two additional busses; one
positive and one negative. Both run to a pos/neg
terminal block I installed
last year to which all other wiring is connected. After wiring up the
busses for the 4-way switch, I covered the positive one and began organizing the wiring with plastic ties.
All that remain to be connected to the busses are the outboard motor
cables. |
|
Yesterday, with the panels still off,
I gave the system a dry run -- and everything worked! Today I'll put the
panels back on and the job will be done. (June 12) |
|
A closer view of the switches. |
|
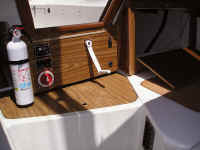
In this shot you can see the new
hinged
door to the settee seat backrest panel I cut out this past winter
(in the open position). I now have easy access to all that unreachable wasted
space. |
| Moving on
with Season 2004 improvements |
| It's never-ending ...
but spring has arrived at last, the projects have begun! |