 |
There are a lot of small repairs and mini-projects yet to
go before I can launch Chip Ahoy for the season. I've ordered the
"new and improved" plastic motor mount board and stainless backing plate
from Catalina Direct -- but the board is back-ordered until
who-knows-when. The backing plate is on its way. My plan it
to remove and refinish the original plywood board -- still in decent
shape -- and refinish it. If the new plastic board arrives in
time, I'll use it: otherwise, it'll have to wait until next
season. (May 12, 2007) |
 |
The plywood motor mount board is still solid, but needs
refinishing to keep it from deteriorating. In the early
spring of
2003, I removed, rebuilt, and repainted the entire motor mount, filled the wood
board where needed then put a few coats of varnish on
it. The motor mount's paint is already deteriorating badly but
will have to make it through another year as is. |
 |
During my Cape Cod cruise last summer, coming into
crowded Sesuit
Harbor in East Dennis, at the busy hairpin
turn into the harbor through its narrow entrance breakwater channel --
the new Honda outboard stalled and wouldn't start
right back up. (I'd begun having problems with it idling,
which I soon fixed!) I ended up drifting stern first back onto the
nearby shore, only yards away. Fortunately, the bottom was sandy
-- right in the middle of rocks on either side -- but it was enough to
damage the rudder slightly when it touched bottom first. (I had
already cranked up the keel before entering.) |
 |
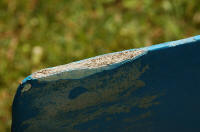
Though the damage was minor, to let it go
without repair would allow water to
get into the rudder's wood core and begin the process of rotting from
within. I let the rudder sit all winter to dry out. Today I
first sanded it down to bare fiberglass. (May 13, 2007) |
 |
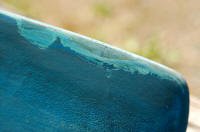
Next I filled it with West System epoxy. |
 |
The starboard side filled. |
 |
After letting it set overnight, finally I sanded down the epoxy.
(May 14, 2007) |
 |
It's now ready for a fresh coat of bottom paint. |
 |
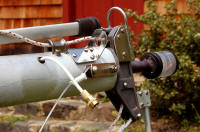
Continuing on with the next repair, I readied the
masthead end of the new VHF
coax cable for its fitting that will connect to the VHF antenna (its
mount is just above the cable exit hole). I ran the new cable
inside the mast on Apr. 29.
(May 14, 2006)
|
 |
After sliding the rubber grommet over the cable (remember
to do this first!), I attached a new Shakespeare PL-259-CP-G connector
to the end of the coax cable. (I've got a small collection of these
suckers from previous installations, most with something minor wrong with
them. I should have enough parts now to make a usable one!)
I left a spare wrap of cable inside the mast, tucked up toward the
masthead, in case I need to lengthen what shows at some later date. |
 |
The new rubber grommet keeps the cable from wearing.
But as I said, remember to put it on prior to fastening the connector.
I used a shot of WD-40 on the hole and grommet, then the fun of stuffing
grommet into hole began. The lubricant helped much over the last
time I did it dry. The grommet is still is almost perfect shape! |
 |
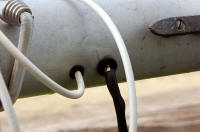
Completing the job, I added a new grommet to the bottom of
the mast where the cable exits. I didn't attach its connector yet,
as I want to be sure the cable is the correct length to reach the radio
in the cabin, then will cut it off perfectly before permanently
attaching the connector. I also left a few inches of spare wrap of
cable tucked up inside the mast, just in case. (May 14, 2007) |
| Moving on
with Season 2007 improvements |
|
It's never-ending ...
but spring has arrived and Sailing Season '07 is in sight |