|
Yesterday I began installing the Raymarine ST1000-Plus
tiller pilot. The first thing needed was to build a backing
plate for the unit with a center section deep enough to hold the 1"
X ½" mounting socket that the unit will slide into through the starboard
side cockpit gunwale. This will get mounted beneath and fastened through
the gunwale. I used three pieces of 3/8" marine grade plywood
(1⅛" total depth) cut
to fit and later trimmed to the gunwale's aft contour. (It turned out
this was considerably overkill -- a single layer would have done!)
Each piece
of plywood was then epoxied to the other. (May 30, 2004) |

|
While the epoxied backing plate block
cured, I drilled a hole in the tiller ¼" X
1" -- 18" forward of the tiller's pivot point -- the
pintles and gudgeons -- and epoxied in the tiller pin. |

|
I made a template for the holes that
needed to be drilled in the gunwale and backing plate block
beneath it, then drilled the four holes I'd use to fasten the
block through the gunwale. Before fastening the block, I drilled
the ½" hole in the gunwale for the mounting socket, saving the block for later. I sealed
the block, mounted it with four screws and finish washers,
then drilled the ½" mounting socket hole into the block,
1" deep from the top of the gunwale. Finally I epoxied the mounting
socket into its hole. |

|
I cut a 7/8" hole. (A 53/64"
hole the
instructions called for -- they've got to be kidding! We all have drills
bits and holes saws in every sixty-fourth of an inch increment, don't we? But
when Raymarine provides its "critical measurement" between the
mounting socket and tiller pivot pin, it's 23.2" Point two as
a fraction of an inch -- what happened to sixty-fourths?!?) Then I wired and
installed the tiller pilot power socket just aft along the bulkhead
above the seat, where I expect it'll be most out of the way. |

|
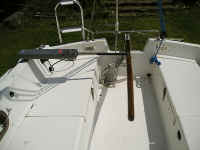
The tiller pilot mounting alignment. I
decided to forego installing the "remote" for this season
(personally, on a 22' boat I can't imagine being "remote" from
very much!) If I find this season that it could be useful, I'll add it
next year. |

|
As the pushrod was ±9" too short
(± being that .2 inches in the instructions' "critical
measurement"), yesterday I called Raymarine to seek its advice.
Though they thought adding 9" distance with push rod extensions
was "pushing it" (no pun intended), they thought it would
work. (They go up to 6".) I ordered a 4" and a 5" extension, which arrived this
morning. (Jun. 2) |

|
The nine inches of extension seems to
be perfect, or as perfect as I'm going to get, or you too for that
matter. I planned to use washers between the extensions if I needed to
add that .2" I seemed short in the overall scheme of perfection. |

|
Raymarine advised me that the most
critical measurement is the 18" from the tiller's pivot point
to where the unit's tiller pin is seated, and here it is exact. Locating
it horizontal is also very important for the correct operation of the
internal compass, and this is near perfectly horizontal, off
perhaps a degree or two. This will work just fine Raymarine has
confirmed. (May 30, 2004) |
Since installing
the Raymarine ST1000-Plus Tiller-Pilot, it has never worked
reliably, continually shutting itself off frequently for no reason yet
found. It didn't work for it's primary intended purpose, my singlehanded
cruise up the coast of Maine and back. I am utterly disgusted with it.
For more information on my frustrations,
click
here. (Sep. 5, 2004)
|
| Final
resolution |
| Moving on
with Season 2004 improvements |
| It's never-ending ...
but spring has arrived at last, the projects have begun! |