|
|

Chip Ford's 1974 Catalina 22
Restoration Project
Sail #3282 l Marblehead, Massachusetts |
|
The never-ending project to fill my hole in
the ocean while bailing it out
The Ongoing Dinghy Project
A 9' Beacon Lynx, manufactured in Bristol,
RI in 2000
|
| Click
thumbnails for a larger picture |
Description |
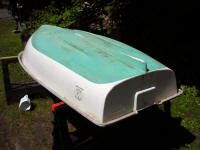 |
With a day off due to postponement
of Chip Ahoy's 2004 supposed launch, I went to work on readying my second
(newer) dinghy after it spent the winter on pallets under a tarp. First
I washed it down, then used a polisher to shine up the hull. (Jun.
27, 2004) |
 |
Next I put a new coat of bottom paint
on it (BoatUS Copper-Coat by Interlux, hard finish). |
 |
After the results of a discussion list
poll on naming the dinghy, l lettered it "Chip Mate" to match Chip Ahoy then waxed the hull.
It's
ready to drop off the dock down the street. (Jul. 3, 2004) |
 |
"Chip Mate" tied behind Chip Ahoy on its mooring in Salem
Harbor, with its "new" old 1965 Johnson 3hp outboard I picked up for
$75. Note the registration number, MS2489CF -- one number after
Chip Ahoy's MS2488CF -- as it'll always be following! (Jul. 15, 2004) |
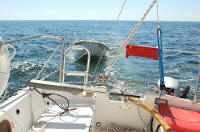 |
Chip Mate towed behind Chip Ahoy. While underway, I
usually have the dinghy trailing behind about 18 feet on a 20 foot
painter. When I come into a marina or mooring, I'll pull it in
accordingly. It rides well back there; in waves or wakes it floats
atop them like a cork. Being far enough behind, it doesn't "surf"
down the face of one and slam into the swim ladder or transom -- a
jarring experience when that happens. (Photo taken underway:
Aug. 17, 2006) |
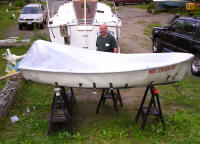 |
After all the rain of Season '04,
when boating turned into mostly going down to the dock and bailing out
the dinghy day after day, and after the suggestion of Hobie Davidson of
the discussion list, late
last season I decided I wanted a cover for the dinghy. ("Chip Mate" is a
9' Beacon Lynx built in 2000.) Even throughout last season's Maine
cruise, bailing out the dinghy was an almost-daily ritual; one morning I
awoke after a hurricane "remnant" passed overhead to find it more than
half-full of rainwater!
Today, my buddy Gloucester
sailmaker Josh Bevins (who built my
roller-fuller system) came by
and started on the project before my next sail up the coast of Maine in
mid-July. (Jun. 22,
2005) |
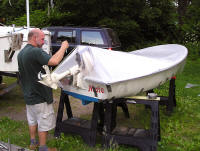 |
Josh covered the dinghy with a sort of rip-stop clear
plastic and cut it into a pattern from which he'll cut and stitch the
cover out of ivory Sunbrella. He'll attach grommets, shock cords and
snaps that'll secure it to the dinghy. I've got to build a couple upright supports from PVC pipe
that'll slide into collars mounted on the bow and middle seats to keep the
cover from puddling, drooping and stretching. (That's Wally
Riddle's "Carpe Diem" in the background. Wally launches early next
week!)
Note that when I repainted the bottom this season (Pettit Unepoxy-Plus
1218 Blue), I raised the waterline by 3" on the transom to compensate
for the additional weight of the outboard. |
 |
While I waited on Josh to build the cover, I added a
tiller extension to the old (1965) Johnson 3hp outboard, so I can sit
and steer from the dinghy's middle seat and better balance the boat.
I removed the rubber grip from the original short tiller, used a 2' piece of
½" PVC pipe as the extension, and forced it
(using a heat gun) over the motor's bare, ribbed tiller. Then I
pushed a short length of copper pipe into its steering end of the PVC
pipe, again using the heat gun, then squeezed the original rubber grip
over the copper pipe. (Jul. 8, 2005) |
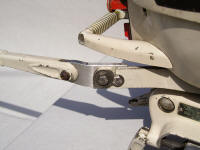 |
But the first step in adding the extension was to get it
to point parallel with the centerline of the boat. In its original
short state, it angled off to port; extended, it would stick overboard.
I removed the original tiller and had the metal shop at the boatyard
fabricate an adapter to my design. I drilled a second hole through the
motor's bracket for the tiller then fastened the adapter to the outboard, the short
(adjustable up and down) tiller handle to the new bracket.
Unfortunately, the speed control lever is part of the motor housing, so
I'll still have to upset the dinghy's balance to adjust its speed. |
 |
Josh delivered the cover yesterday, along with a bag of
hardware to fasten it to the dinghy. Today I drilled and fastened the four hooks
beneath the rubrail on each side, which the shock cord in its hem catches,
and a pair of twist snaps to the transom. (Jul. 14, 2005) |
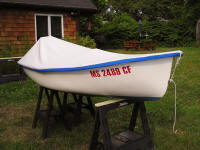 |
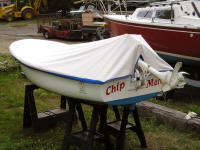
The front of the cover is tied off to
the dinghy's bow eye. I had added a short length of
½" PVC pipe just forward of the middle
seat, secured by a pair of "U"-shaped PVC pipe clamps that allows the
pipe to be slid out. I added a T-fitting to the top of the pipe.
(Included beneath the cover in these photos.) This, Josh suggested, will keep the cover from puddling, drooping
from the weight of the water, and
stretching. The cover is so tight now that I removed the
pipe/support. I won't use it again until the cover shows some sign
of stretch -- as it is, it's almost, maybe even a little, too tight now. |
 |
The cover is double-reinforced canvas
over the outboard to delay if not prevent wear there.
Josh assured me that the entire cover will stretch now
that it's on . . . and I'm counting
on that happening, soon. Getting the cover on and off right now
from above in the cockpit of Chip Ahoy will be a real challenge, if
possible.
(This became a serious consideration,
so Josh subsequently stitched a zipper into the cover: not
perfect, but a big improvement. See the next page.) |
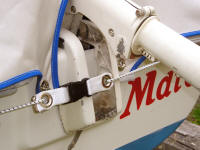 |
The shock cord ends and fastens at the stern beneath the outboard.
The rear of the cover is held with a twist snap on the transom on each
side of the outboard. |
New
Problems Discovered and Addressed
- Next Page - |
|

|