 |
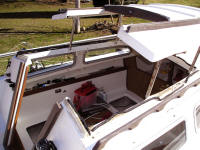
I've never been able to raise the pop top since I've
owned Chip Ahoy: the gasket had cemented it solid to the cabin top; lifting it
was impossible. Though a canvas snap-on pop top cover still in great
shape came with the boat, I've never used it. (It'll be interesting to
see how well it fits once I get this project completed.) This is the first time I've had it up, thanks to
two more years of gasket deterioration.
(Apr. 9, 2005) |
 |
This was extremely low on my priority list of things
that needed to get done back then, so I put it aside for someday
down the road, maybe. Last season, I recognized that it would need to be
replaced just to maintain a waterproof seal, keep the cabin interior
dry, whether or not I ever
popped it up again once a new gasket was installed. Just getting the
remnants of the old gasket off is a chore, and whoever applied it either
had a few cocktails too many or was cockeyed. |
 |
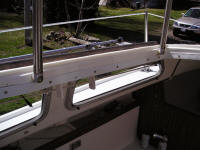
In many areas the gasket didn't run in a straight track. But
where it was still there and stuck, top and bottom they're fused to the fiberglass, in places
drooping down over the cabin. |
 |
The old gaskets (there were two, both top and bottom) are in three conditions:
the outer surface is the consistency of styrofoam; the middle of them
are like
sticky tar, and the inner surface is like cement, fusing it to the fiberglass. |
 |
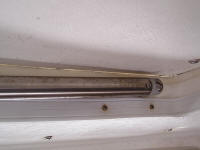
A close-up view of the "styrofoam" outer surface of a
gasket. |
 |
I spent most of yesterday and another hour this
morning cleaning off the old gaskets and the residue from the bottom one.
What wouldn't come off with the putty knife gave up to acetone and elbow
grease. When I was done with the cabin top, it shined like new. (Apr. 19, 2005) |
 |
Once I had the fiberglass clean, I applied the new gasket
from its roll around the opening on the cabin top, paying out a few feet
at a time. |
 |
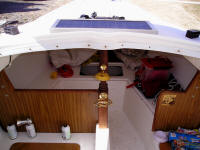
I peeled off the paper backing from the roll as I moved around
the cabin. (That's the solar panel on the cabin top just forward of the
hatch. The pop top just barely clears it. When I mounted the solar panel
last spring, opening the pop top wasn't a serious consideration, but I
did leave a fraction of an inch space -- almost not enough.) |
 |
The gasket applied nicely even around the corners and curves. |
 |
The forward starboard side. |
 |
I cut the ends of the gasket flush with the companionway.
|
 |
Uh oh. When I closed the pop top on the gasket, I found
gaps about a third of the way aft from the forward edge. (Remember, I
removed old gaskets from both the bottom -- and the top.) I'm hoping that
when I install the four new hatch dogs and tighten them down, the hatch will
be pulled against the gasket. Chip Ahoy never had even one hatch dog.
which might explain the prior use of two gaskets. But installing them --
and the new pop top power assist kit -- will have to wait until next weekend.... |
|
--
Continue to Pop Top Page 2
-- |
| Moving on
with Season 2005 improvements
|
| It's never-ending ...
but spring has arrived at last, the projects have begun! |