 |
In
2005 I installed a new traveler car and rigged control
lines forward outside the coaming and into the cockpit. I was never
truly satisfied with the result.
(Apr. 19, 2009) |
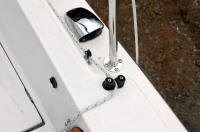 |
I decided I wanted the pull to be into
the cockpit, not forward. After last year's cruise up to Chebeague
Island and back, I planned to rearrange the situation this spring. |
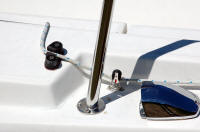 |
I need to have the control lines make a 90 degree curve
inboard. Relocating and repositioning the cam cleats, adding a cheek block on each side
instead to redirect the lines, should accomplish this. |
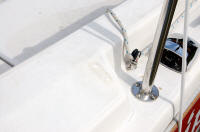 |
After removing the traveler control line cam cleats on
both sides yesterday, I filled the holes through the coaming with tinted
West System epoxy. This morning I had to add a few more drops to "top
off" the holes [closeup].
The cheek blocks will be located in this position on both sides. (Apr.
20, 2009) |
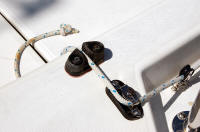 |
I got back out today to where I'd left off on
this small project.
Earlier this week I drilled holes for the cam cleats then bedded and
mounted them inboard at 90º angles from their
original positions. I got
that step completed just before the rain started. The rain stopped last
night, so today I drilled the coaming then bedded and fastened the micro cheek blocks on both sides. (Apr. 24,
2009) |
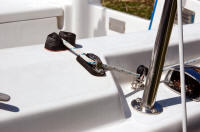 |
This set up the turn I wanted to bring the traveler
control lines into the cockpit. |
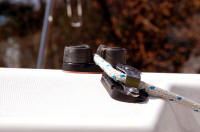 |
With the traveler control lines coming up from the deck
and the stand-up blocks, I wanted to create an angle on the coaming so
the control lines would clear the the edges before reaching the cheek block
and turning to the cam cleat. I
happened to have a pair of Harken Cam-Matic cam cleat wedges left over
from a previous project and most amazingly -- while looking for
some sort of solution I actually discovered them
among a box of odds-and-ends remnants from past projects! |
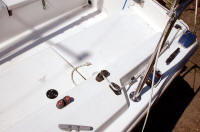 |
Sometimes it pays off to never throw away anything! The
wedges are the perfect solution. I just needed to drill two 3/16" holes
through the nylon wedges to match the cheek blocks, and through the
coamings on each side. I added a couple globs of 3M 4200, dropped
in the pair of 1" 10X24 pan head screws, added washers and nyloc nuts
from within each coaming box, and tightened them down. |
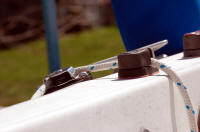 |
The first small project completed for Season 2009.
|
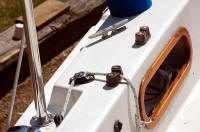 |
This setup -- adjusting the traveler by pulling inboard
-- will work much better singlehanding than my
first effort.
(Apr. 24, 2009) |
See related project
Traveler Car & Control Lines
Project |
| Moving on
with Season 2009 improvements |
|
It's never-ending ... but Sailing Season '09 has arrived! |