|
|

Chip Ford's 1974 Catalina 22
Restoration Project
Sail #3282 l Marblehead, Massachusetts |
|
The never-ending project to fill my hole in
the ocean while bailing it out
Preparing for Sailing Season 2010
The Windows Removal and Resealing Project
— Page 2
—
|
| Click
thumbnails for a larger picture |
Catalina Direct Installation Instructions

CLICK HERE |
 |
By the fourth and final window, I had the process down --
but it took three to climb the learning curve. With each window a new
problem arose and a new trick was learned.
As with everything else,
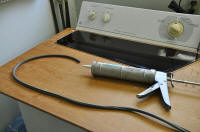
the finish depends on the preparation. The first step was to scrape off
the old sealer then thoroughly clean the glass. The tinting company did
a good job of cleaning the interior glass, where they applied the
tinting film -- I wiped that side down with
Windex glass cleaner. The exterior glass was another thing; it took scraping off the
old sealer residue then wiping it down first with acetone then with Windex
glass cleaner. (Mar.
28, 2010) |
 |
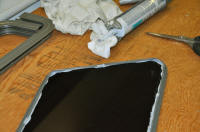
The next step was to
cut a strip of glazing channel, into
which the glass is inserted. After a problem with the first window (see
below), I learned to really stretch the channel strip to make it fit
tightly where it joins at the bottom of each window. Once close to proper length, I ran a
bead of the silicone building sealant included in the Catalina Direct
kit (Dow Corning 795), then stretched it in place around the glass. Again, I
stretched the channel tightly, worked it around the glass a number of
times, then cut off the final small piece of excess length.
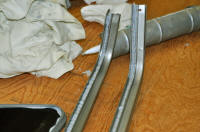
The next step was to run a bead of the 795 in both halves
of the frame's window gap. Now the frame and glass were ready to
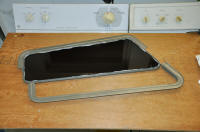
assemble. Photo on the right: The two forward
window frames were the most difficult, with the sharp angle of the lower
frames. The trick was to start the glass into the more perpendicular
side, then wrestle in the more angular side. This is the step that caused the
problem with the first window, and bunched the channel where the frames
met. If the channel bunches, joining is near impossible. |
 |
 |
 |
 |
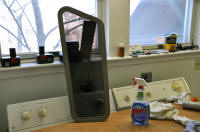
After that frustrating problem with the first window, I
turned to
using clamps to gradually compress the frames around the glass and glazing
channel. This way, I could better control the potential sandwiching of
the channel where the two halves meet -- it was a major improvement over beating the frames
together with a hammer and small block of wood. Once you can line up the
holes in the joint plates (I left one loosened screw in each joint
plate; used an awl to center the open hole), the two screws on each end
pull the frame together nicely. Unfortunately, I stripped the threads on
one screw and had to run a thread tap through the joint plate and use a
new screw. |
 |
Once the two frame halves were joined together and the screws were
tight in the joint plates on each end, I cleaned off the excess silicone
that'd squeezed out, then cleaned the glass. Tonight I finished the
final window, after starting the job yesterday. |
 |
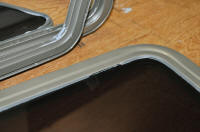 |
On the left is one of the flaws -- apparently caused when
I had to pull the frame from the window and reset it. Lesson: Inspect
carefully and constantly as you move along seating the glass into the
frame halves. I didn't catch this
until the window was fully assembled, in the clean-up step. I don't think it would have
leaked, especially since it is at the top of the window, but I patched
it with silicone nonetheless. |
 |
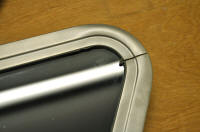 |
Another minor flaw:
The first window assembled -- with the channel sandwiched
between the frame halves. This is the window frame I used a hammer and
small block of wood to join. It took over an hour, trying to tuck the
channel into the frame using a small screwdriver, to finally join the
halves and set the screws tight in the joint plates. From this experience I learned to stretch the channel very
tightly around the glass before putting it into the frame, then got out
the clamps for the next and following windows. (Mar. 28, 2010) |
 |
The final reassembly step was to squeeze the window
molding into the trim strip gap on the inside of the window frame. The
trick is to first push the edge against the glass and, while holding the
molding tightly against the glass, using a small screwdriver to force
the outer edge beneath lip of the frame, a quarter of an inch or so at a
time. Every inch or two, I went back and used a finger to push the
molding in tightly, smoothing it forward before pushing the next inch of
molding into the channel. When I completed the circumference, I cut the
molding to butt tightly where it joins. (Apr. 4, 2010) |
 |
Today's forecast called for showers in the early
afternoon, heavier rain overnight, so I decided to rig a tarp over Chip Ahoy's cabin
windows. While I think the windows are sealed tight with cut tarp and duct tape,
I didn't want any leaks to let water inside that would need to
thoroughly dry before I could continue with this project. (Apr. 6,
2010) |
 |
I used a couple of the winter skeleton frame PVC pipes
and one of the new 8'x10' tarps that just arrived, replacements for the
firewood rack tarps next winter. Ozzie (left), the neighbor's cat, loves
being aboard, but he kind of gets underfoot now and then. Gilly (right),
Barbara's cat, is more of a landlubber. The ducks on the roof wait
patiently for the action to die down so they can land and grab a meal of
cracked corn I throw out for them. |
 |
 |
Window #1: This morning the sun rose bright; the forecast was for
the temperature to climb into the mid-80s -- in early April! I got out
early and removed the temporary tarp, then started on the the aft,
starboard window. I removed the tarp section and tape, scraped off the
remaining black sealant, then wiped down all around cabin trunk
and window hole with Acetone. When clean, I compounded and waxed
the gelcoat while it was easily accessible. (Apr. 7, 2010) |
 |
 |
I tried installing the window frame for size, inspecting to see if
the small plywood shims that were originally attached to each frame's
bottom when I
removed them were necessary. No other C22 owner I've asked has ever found
them in their boat's windows. It appeared that they were needed to
center the window frame top and bottom. I had to sand down a bit of the
marine plywood shim
pieces my buddy Ace, the boatyard carpenter, cut for me to make them the same thickness as the
originals (the darker one in the center foreground on the right is an
original). |
 |
|
NEXT |
|
Back to Page 1 |
| Page 3 |
Page 4 | Page 5 |
Page 6 |
|
Moving on
with Season 2010 improvements |
|
It's never-ending ... bring on Sailing Season 2010! |
|

|