 |
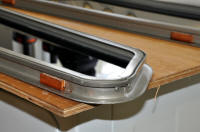
This step slowed today's planned progress,
but I didn't want to do it until I could look closely and determine if it was
necessary. I mixed a cup of West System epoxy resin, secured the shims
to all the frames with it (just don't block the holes for the inner
frame screws), then had to wait for it to fully cure. If
getting the frames back in was going to be as difficult as prying them
out was last fall, these wood shims were going to be manhandled, take lots
of abuse. (Apr. 7, 2010) |
 |
 |
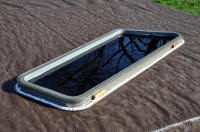
While I was waiting, I masked around the window hole,
using the indention marks in the gelcoat made by the old window frame as a guide. The tape will later
make removing excess bedding compound easier. |
 |
After the shims were bonded well to the frame,
the epoxy fully cured, I opened
the caulking cartridge of 3M 4200 that came with the kit from
Catalina Direct. I laid a bead of it around the inside face of the
outer frame. That done, it was good to go. |
 |
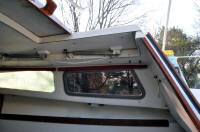
It was definitely a fight
forcing that window back into its hole in the trunkside. The aft-lower corner would
not fit. In the end, I used a length of oak as a lever, a block of 2x4
on the deck as a fulcrum, another piece of 2x4 atop the oak lever and against the frame, and a balpeen
hammer. When that didn't work, I switched to a small sledge hammer. (For
a look at my new "custom window frame installation tools in use"
see
the photos below.) That stubborn frame finally relented, fit inside the
trunk -- fortunately before I broke or bent something. |
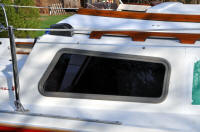 |
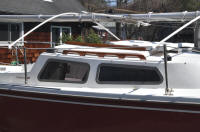
The first window, reinstalled.
Tomorrow morning I'll tighten the frame together into the bedding compound
then move on to the forward window. The cabin top will likely need to be
to covered again, over the port side. More rain is forecast for
overnight tomorrow into Saturday morning. By the end of the weekend I
hope to have this project completed. |
 |
 |
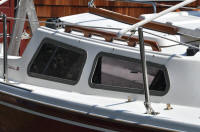
Window #2: Yesterday's temperature broke the
record, officially hitting 90°. It was back to seasonal today,
the mid-60s. After tightening the first window frame, I got the second
one in. Like the first, it was a wrestling match, so I got out my new
"custom window frame installation tools" -- the wood blocks and small
sledge hammer. (The PVC pipes from the winter skeleton frame and the
piece of lattice bent and bungied over the steaming/deck light are to
support the tarp, used in the event of rain.) (Apr. 8, 2010) |
 |
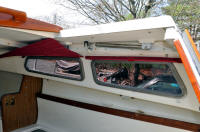 |
The window frame went in easily
enough, but its front edge would not seat properly to where I could
fasten the interior frame. It took some pounding (then tapping) from the outside to
finally align the frame in the trunkside hole and catch the screws
from inside, tighten them enough to pull in the frame. This required
much climbing in and out, up and down the stepladder, until I could
tighten the interior and exterior frames evenly. By the time I'd
succeeded, the expected gray cloud cover had moved in. Showers were
forecast, so I called it a day and pulled the temporary tarp back over
the cabin top. Showers are expected to last through tomorrow, so I
probably won't get the port side windows in until Saturday. |
 |
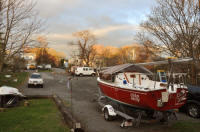
Chip Ahoy's cabin has been covered for a day of rain showers. It
doesn't appear that anything will get done on the project today, as
predicted -- but the weekend is looking good. (Apr. 9, 2010) |
 |
Window #3: By early this morning the sky had cleared, though it was
pretty chilly; in the low-50s. I got out and pulled the tarp off the
boat then the cover off the aft, port side window. By window number
three, I've gotten the steps down very well; scrape off the old compound
remnant then wash with acetone, compound the trunkside around the
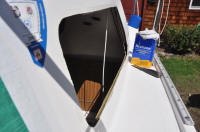
window, then wax. Note the gap in the trunkside, and a third piece of
fiberglass coming down between the inner and outer shell in the aft gap
(see close-up
detail). (Apr. 10, 2010) |
 |
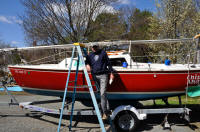 |
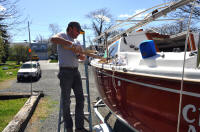
Barbara came out just as I finished with the cleaning
and waxing, took some photos of me at work. After running the bead of 3M
4200 around the inside of the outer frame, it put it into its hole --
and again it was a wrestling match to make it fit. |
 |
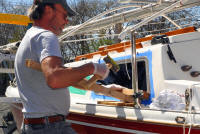
By mid-day the temperature warmed up
enough to doff the sweatshirt. With window number three, I'd gotten pretty good with my
"custom window frame installation tools." Between the oak
lever to adjust horizontally, blocks of 2x4, and the trusty small sledge hammer, adjustments
are possible on the installed window frame and it can be made to seat
and fit. |
 |
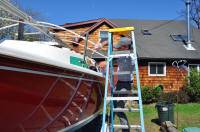 |
The finishing touches with the hammer and block,
a light tapping to center the frame laterally so the inner frame will line up with the
outer frame's screw holes. |
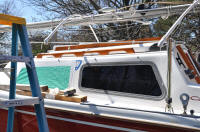 |
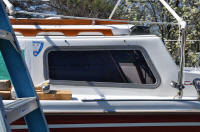
Window number three, installed done. The final window will go in
tomorrow and the project will be completed. |
 |
|
NEXT |
|
Page 1 |
Back to Page 2 |
| Page 4 |
Page 5 |
Page 6 |
|
Moving on
with Season 2010 improvements |
|
It's never-ending ... bring on Sailing Season 2010! |