 |
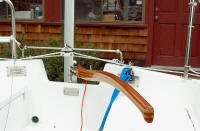
I hung the
new IdaSailor rudder and attached its new tiller (with the six
additional coats of Cetol I'd applied over the winter) to make sure
it'll fit when the time comes to launch. I do hate surprises then!
The pin on top for the Raymarine tiller pilot was installed by Joel at
IdaSailor before the rudder was shipped to me. (May 24, 2008) |
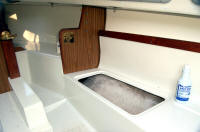 |
Yesterday I began cleaning the cabin
interior. I decided
to try using the
Easy Dab Bacteriostatic Crème Cleanser that Bob Keim sent along
with the Poli Glow kit. I hate it almost as much when a product
exceeds my expectations, as Easy Dab did, as when it fails.
My anticipated hour of a quick cabin cleaning turned into
about three hours using Easy Dab. It works so well that once
I started, there was no stopping until the cabin was completely done or
it would have been obvious. It contains crystaline quartz silica
and goes on like polish, removing stains I thought were permanent,
especially rust stains. What I've completed is the best the cabin has ever looked since I got
the boat! (May 25, 2008) |
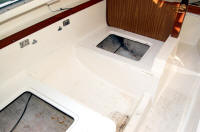 |
I cleaned from the v-berth around the starboard side,
across the companionway and beneath the aft dinette cushion and seat before calling
it a day. Having this small area and the companionway sole
to complete still shows the difference. This worked out well as I hadn't expected to want
before-and-after comparison photos of a simple cabin cleaning, but took
some shots this morning before finishing up the final area. (May 26,
2008) [Closeup
Detail] |
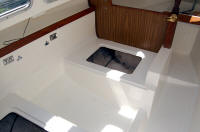 |
A last minute before-and-after
comparison: Photo above, before; and on left, after. The cleaning is completed.
The results are far superior than
I'd planned before starting. Of course, it also took much
longer than I'd intended to spend just cleaning the cabin interior.
Once I got started though, and discovered what Easy Dab and a little
rubbing can do, then I had to spend whatever time it took to
do it wherever it was needed. Each area or "permanent" stain
became a small personal challenge. The unanticipated time and
effort was worth it: The cabin interior looks the best it
ever has since I've owned this boat, and should stay this way for a
while. |
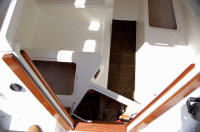 |
All that remained was to drop in the new carpet.
The cosmetics are done completely from stem to stern, now inside as well. Onward next to lugging out and installing the
two batteries, hooking them up
to the busses and 4-way switch, hauling out the porta-potti and locking
it in place in the v-berth area. Then I can begin carrying out and loading the boat's
other equipment and amenities in preparation
for launching later this week! (May 26, 2008) |
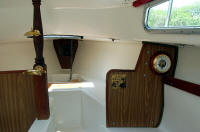 |
With the boat thoroughly clean and still empty of gear, this was a good time to mount the new barometer that Barbara
gave me for Christmas. I wanted it some place visible but
out of the way so it wouldn't get bumped and banged. The oil-lamp
in its gimbled mount on the mast compression post (left of center in the
photo) is always subject to that. I shattered the crystal
chimney by bumping it a day or two after first installing it before my
first coast of Maine cruise. The
lamp is always the last thing I bring back into the cabin, when all else
is done, and the first that comes out in the fall. Both the oil
lamp and brass/cherrywood wall barometer are made by
Weems & Plath.
(May 27, 2008) |
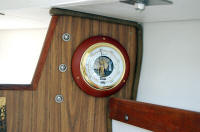 |
The starboard bulkhead fit the requirement. The barometer
was designed to hang on a wall by a hook on its backside. Over the
winter I drilled and countersunk three small holes for screws.
This morning I took the instrument off the kitchen wall and removed the
hook. In the cabin I marked and drilled three shallow holes on the
bulkhead to accept the #4x1" brass flat head Phillips screws. The
barometer looks good there: visible and out of the way. [Closeup
Detail] |
 |
Then the loading continued.
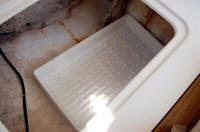
Ahead of equipment and amenities, the first thing that goes
in are the plastic seedling flats I discovered make great waterproof
liners for the bottoms of the cabin storage lockers -- they're somewhat
flexible, inexpensive, and I happened to have some on hand. They
keep things from sitting in any water that may seep in and accumulate
over the season, wetting or rusting things. (See the rust-stain
outline of a gallon can of denatured stove alcohol before I came up with this
simple solution. The intrusion of rust actually corrupted the alcohol inside
the can, which ultimately plugged a metering valve in the pressurized stove.)
Anything water-damageable goes into a tray. I use one in the port
side forward locker, two in the aft locker beneath the dinette seats.
(May 27, 2008) |
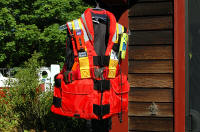 |
Loading the boat with equipment and
amenities for the season is almost completed. The new life vest and
safety harness (with its new strobe light and PLB) go in last, along with two SOSpenders inflatable
vests and other safety equipment used regularly
or needed in an emergency, so I can find and put my hands on it quickly.
(May 29, 2008) |
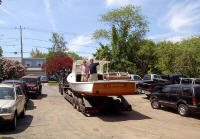 |
Toby Reiley and his partner Joey had "Firewood," the
juniors racing committee boat, trucked out of my yard today from
alongside the house, and launched at the Pleon YC ramp on Marblehead
Harbor. After giving them a hand, I went back to loading and
preparing Chip Ahoy for launch, now set for Monday-Tuesday. It's
supposed to begin raining tonight with thunderstorm through tomorrow and
continue raining through Sunday, and trying to schedule my helpers is
like herding cats -- as usual. (May 30, 2008)
More Firewood photos
Photo 1
= Photo 2 |
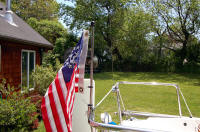 |
While at West Marine yesterday to pick up some
Weems & Plath lamp oil,
on impulse I bought a stainless steel rail-mounted flag staff. I'll use it
this year instead
of running the flag up the
spreader halyard
on the rare occasions when I don't have the radar reflector hoisted.
In this photo, the backup VHF
antenna is seen on the opposite corner of the stern pulpit. Its coax cable
runs through the aft cowl vent into the cabin where it is ready to connect if necessary. (May 30,
2008) |
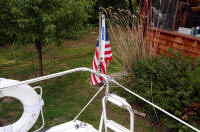 |
The mounting bracket is made for a 1" rail but I couldn't get the
jaws to clamp tightly around Chip Ahoy's 1" stern rail; with the
Allen head screw tightened a slight gap
remains between the jaws, as if the rail is a larger diameter. The flathead screw
that's supposed to go through from the outside bracket jaw into a hole
in the base of the staff
left it loose in the bracket. I ended up just tightening
the screw against the staff, not using the hole. It works, holds the
staff tightly.
I added a touch of Blue Locktite (with its stainless steel primer) to the screw's threads,
tightened the screw and called it done.
Closeup
Detail (front)
= Closeup
Detail (back)
= Even
Closer Detail |
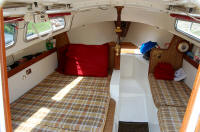 |
Chip Ahoy is loaded and ready to launch, and cruise.
This morning Wally Riddle and I will trailer it down to Riverhead Beach on
Marblehead Harbor and raise the mast. I'll spend the rest of the
day rigging, tuning, adding the new boomkicker, connecting cables and
wiring, and getting the boat
otherwise ready to launch on tomorrow (Tuesday) morning's high tide. (Jun.
2,
2008) --
More cabin interior photos -- |
|
NEXT |
|
It's never-ending ... but Sailing Season '08 has arrived! |