tiller01_small.jpg) |
While I'm at it with the Cetol, I'll
give the new IdaSailor tiller (for its
new rudder) a few coats as recommended in the instructions. |
tiller02_small.jpg) |
Joel Santarone at
IdaSailor Marine added a new pin to the tiller for my RayMarine
Tiller Pilot.
Raymarine was generous enough to send a package of six (the smallest amount
available) out to his Idaho shop at no charge whatsoever. I told Joel to install
one, send me a spare, and keep the rest for his inventory if he ever needs
one for another tiller. |
 |
Yesterday I applied the third coat of Cetol to the
exterior companionway trim, unmasked the cribboard's louvered vent this
morning. I'm used to a glassy smooth finish using varnish, so the
results of Cetol -- with no sanding between coats -- is quite a
different effect for me, with the grain so prominent. It sure is
less work, and I'll probably get used to the look. It's a vast
improvement over the oiled teak. Sanding between
the louvers between coats would have been a real nuisance anyway.
(Jan. 29)
--
See a close-up
before-and-after comparison of the vent -- |
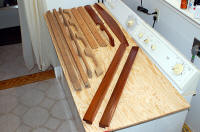 |
This afternoon I hand-sanded all the
remaining teak pieces with 100 grit paper: The sliding hatch
rails, hand rails, and companionway cabin trim. Next, I'll move
the completed teak pieces out of the way then apply the first coat of
Cetol to the still unfinished pieces. |
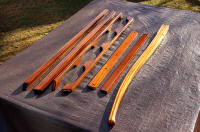 |
I've been working on the hatch rails, handrails, interior
companionway trim and the tiller most of this week. I've learned
that Cetol can be treated like varnish, wet-sanding with 400 wet-and-dry
paper between coats, but this means more coats of Cetol than the
recommended three (four if a Scotchbrite pad is used), according to
Sikkens. The trim pieces have three coats on them now; the tiller
five. I'll add another today and see how they look. (Feb. 2,
2008) |
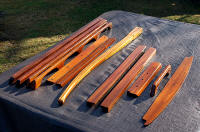 |
All the teak pieces are now covered with
at least three coats of Cetol. I didn't
wet-sand the first batch of trim (to the right of the tiller) nor the cribboard vent (in
photo above); just used
a Scotchbrite pad between the second, third, and fourth coats. Working on the second batch (to the
left of the tiller), I've lightly wet-sanded twice between their three coats of Cetol.
They'll get another coat later today. The tiller has been wet-sanded twice between five coats but
will get another one or two. I'll likely go back to the first
batch and wet-sand them too then apply another coat or two, now that
I've found how to get the "glassy" varnished- look finish I'm accustomed
to and like. |
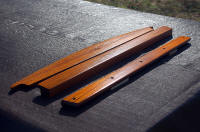 |
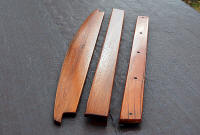
A comparison of a wet-sanded teak piece (bottom right,
three coats of Cetol) and two non-sanded pieces (top left, four coats
applied, Scotchbrite pad scuffed between final two coats).
--
See enlarged
detail -- |
 |
Same pieces as above, a day later. After another wet-sanding and coat of Cetol late
yesterday (#4) of batch two, the piece on the right and the rest of batch two
are pronounced "done." Now
that I've discovered how well wet-sanding between coats does, I'll
revisit the first batch (two examples on the left), wet-sand the pieces,
and apply another coat or two of Cetol. Who says you can't get a
varnish look from Cetol? It's all in the technique. (Feb. 3, 2008)
--
See enlarged detail
-- |
 |
The teak trim from batch one that I intend to wet-sand
before applying another coat or two of Cetol. Note the raised wood
grain. With the first batch of trim, I followed Sikkens'
directions on the can and merely scuffed each coat the following day
with a Scotchbrite pad before applying the next application, four in all
to this point. (Feb. 4, 2008)
--
See enlarged detail -- |
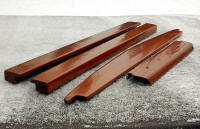 |
Batch One completed. I aggressively wet-sanded the
pieces to remove the raised wood grain between three more coats of Cetol. The companionway hatch
weatherboard and step (the two pieces on the right) were treated to a fourth
coat of Cetol -- mixed with Penetrol as another experiment. The
additive worked as perfectly as it does with varnish, providing better flow to the Cetol
and a smoother finish. The
Teak Trim Refinishing Project is now done to my satisfaction!
(Feb. 8, 2008) --
See enlarged detail
--
-- See
Before-and-After comparison -- |
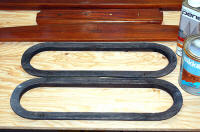 |
I overlooked removing the teak coaming pocket
trim rings last
fall, so this morning I climbed aboard under the tarp and took them off.
One needs to be Gorilla Glued back together, then I'll sand with 80 grit and begin
applying my Cetol
wet-sanding and Penetrol
process to them. (Feb. 10, 2008)
--
See enlarged detail -- |
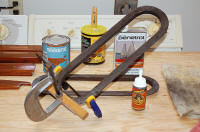 |
The broken trim ring, glued and clamped. |
|
Back to Page 1 |
NEXT |
Page 4 |
Page 5 |
|
Moving on
with Season 2008 improvements |
|
It's never-ending ...
but Sailing Season '08 is ahead and coming! |