 |
I cut strips from 3/32" gasket
material and using Gorilla Glue lightly cemented the strips in a few
spots to the bottoms of the hatch rails, using tape to hold rail and
gasket together until dry. My plan is to apply 3M 4200 bedding
compound between the gasket strips and the cabin top just at where the
screws exit. The next time the rails need to be removed, only the
gasket material should be possibly damaged. The 3/32" difference
also should help the hatch slide easier. I'm still contemplating
how to rejoin the split wood. (Apr. 17, 2008)
[Closeup
Detail] |
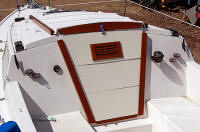 |
I finally have the cabin closed up,
have sealed and
fastened the sliding hatch rails, the hatch weatherboard and its half of the
hasp latch, and the interior companionway trim. While I had the
sliding hatch off I thoroughly cleaned it of years of built-up and
embedded mildew and grim with a mixture of slightly water-diluted bleach
and Lestoil. It was sparkling when I was done and ready for
reinstallation. First thing I
did this morning was tighten the companionway trim I mounted late
yesterday firmly into its bedding compound, then fastened the interior
trim in place.
(Apr. 18, 2008) |
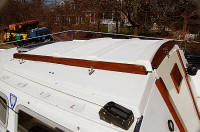 |
I got the split hatch rail on using
just bedding compound to fill the gap between by the new gasket and the missing
teak at the split. It's not perfection, but I'm about 90% satisfied with the
outcome. The gasket raised the hatch by 3/32" on both sides and enables
it to slide noticeably easier.
Tomorrow I'll add the new handle to the hatch weatherboard, mount the hand rails
and coaming pocket rings, and this project will be completed.
[Closeup
Detail] |
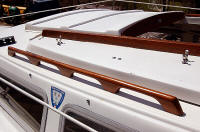 |
Today I completed the Teak Trim Refinishing Project of 2008.
All that remains to do is tighten down the hand rails into the bedding
compound in the morning. I installed them today along with the coaming pocket trim rings.
I decided to forego adding the new
sliding
hatch handle. The hatch slides easier since adding the gasket
material beneath the rails; mounting the handle could create
problems unnecessarily. I'd have to mount it high on the hatch
weatherboard if it's to clear the lock hasp, and I'm not confident I have
clearance on the interior backside at the top to fit screws through to
the handle. I
don't want to risk drilling through the teak weatherboard only to find
out not -- especially since the hatch now slides so much better.
(Apr. 19, 2008) |
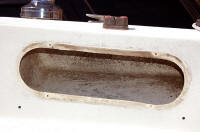 |
As with the sliding hatch, before adding the coaming
pocket trim rings I scrubbed out the two pockets with a slightly water-diluted mixture of
bleach and Lestoil using the sponge with a Scotchbrite backing. The
pockets needed cleaning of embedded mold and grim as much as the hatch
did -- along with a couple of fortunately vacant wasp nests that were hidden within
each. |
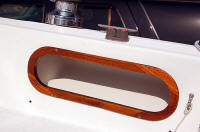 |
After a thorough cleaning of the pockets' interiors, I
put the refinished teak trim rings back on. I'm gratified now that
I went out in February, crawled aboard beneath the tarp, and
removed them for
refinishing after realizing I'd forgotten to include them last fall
when removing the rest of the trim. (Apr. 19, 2008)
See:
Before-and-After |
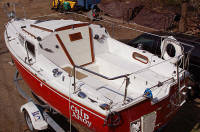 |
This morning I snugged up the hand rails into the
compound and declared the teak refinishing project done. It should
be good for at least a couple of years. The boat's ready to be trailered down to the boatyard
to have its repaired keel rehung when I get the call to bring it down,
probably sometime in the coming week. (Apr. 20, 2008) |
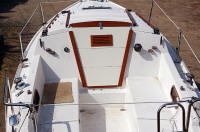 |
Everything's bedded, fastened, and looking vastly
improved. |
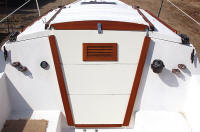 |
There seems to be a bit more
port-starboard play
between the cribboards and the vertical tracks they slide into than
there used to be, and between the cabin trunk and and those tracks too. I can't imagine why, but the boards are looser all
around. The hatch has more
port-starboard play in its rails as well, but I expect that's from the
new gaskets beneath the rails lifting them and hatch 3/32" higher; it no longer
scrapes (rests) on the cabin top. |
 |
I couldn't leave well enough alone -- that hatch handle
kept calling to me. So I took another look at the situation, tried
another approach. I found that I could lift the hasp latch before pulling
the hatch all the way closed and the latch would fit nicely beneath the
handle. I centered the handle where it would mount permanently and
marked the weatherboard. Using a 1/8" bit I drilled through the teak
and fiberglass for the two coarse wood screws, then used a bigger bit to
drill out the holes to the screw size, keeping them a bit undersized,
very tight going into the handle. I wanted the screws to have a
good bite in the teak. |
 |
I inserted the two screws from the
back interior just enough to poke out through the new holes in the hatch
weatherboard, then used the screw tips to mark the base of the handle where
the screws would enter. After drilling the handle to accept the
screws, I put a dab of 3M 4200 around each hole then screwed the handle
on securely. |
 |
I can't flip the latch down without sliding the
hatch a bit forward, but it's basically one motion and the hasp latch
drops down. I just couldn't call the project complete
without that darned handle. Now it's completed for sure, with no
parts left over! (Apr. 20, 2008) |
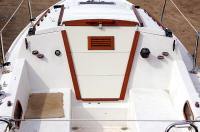 |
The Teak Trim Refinishing Project complete .
. . or just about . . . uh oh. (Apr.
21, 2008) [Closeup
Detail]
See:
A before-and-after
comparison |
|
Page 1 |
Page 2 |
Back to Page 3 |
NEXT |
|
Moving on
with Season 2008 improvements |
|
It's never-ending ...
but Sailing Season '08 is coming fast! |