 |
After a week's bout of the flu, I'm
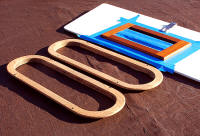
back at the project. The cockpit coaming pocket trim rings are now
sanded with 100 grit and ready for the first coat of straight Cetol. The
top cribboard's louvered vent is ready for wet-sanding and another coat
or two of Cetrol/Penetrol. (Feb. 16, 2008) |
 |
The cribboard's louvered vent is the only cockpit piece to not
have received the "Penetrol Finish Treatment" yet, so I'm about to revisit
it too. I'll wet-sand with 400 wet-and-dry paper to level that
raised grain then apply
another coat or two to fill in the valleys as I do the trim rings. Nevermind the vent
louvers -- too much tight detail work in too difficult an area for a guy
recovering from the flu. --
See enlarged
detail -- |
 |
The cribboard's louvered vent wet-sanded and ready for
the first application of the Cetol/Penetrol treatment. Note that the
high spots have been flattened (dull), the valleys (still shiny) need to
be filled to level out the common surface. (Feb. 17, 2008) |
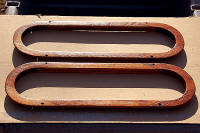 |
The coaming pocket trim rings after their first coat of
straight Cetol. Note how it soaked into the teak. Another
application of straight Cetol will be applied before wet-sanding
commences. The trick is to first build up a substantial layer of
Cetol, then wet-sand to get it smooth. Once the overall surface is reasonably smooth
and even,
begin applying coats of the Cetol/Penetrol mix between light wet-sandings
until a glass-like finish is achieved.
--
See enlarged detail -- |
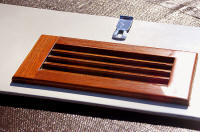 |
The cribboard vent louver refinishing completed.
(Feb. 25, 2008) --
See
before-and-after -- |
 |
The coaming pocket rings completed --
refinishing project completed. (Feb. 25, 2008)
--
See enlarged detail
--
-- See
before-and-after -- |
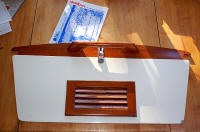 |
Now that the refinishing is done, I wonder if I'll be
able to close and latch the hatch with the new handle installed . . . ?
(Mar. 11, 2008) |
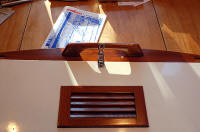 |
Perhaps I can lift the latch as the companionway hatch
closes, before the handle blocks it? One step at a time, I guess
-- and wait for spring to arrive and uncovering of the boat.
It can't get here quickly enough. |
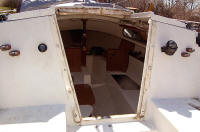 |
With the boat finally
uncovered, today I
scraped off all the residue bedding compound around the companionway and
along where the sliding hatch rails will go, then cleaned further with
acetone. Around the companionway I'd ripped off spots of gelcoat
down to fiberglass matting when removing the trim, so filled the spots with
epoxy. (Apr. 16, 2008) |
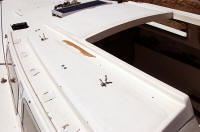 |
The remnants of old bedding compound (see
before) and just plain dirt along the port side hatch rail area cleaned
up better than I'd anticipated -- the piece of
teak that split off the
rail remains intact on the cabin top. (Apr. 17, 2008) [Closeup
Detail] |
 |
Both sides of the sliding hatch area and around the companionway
cleaned up rather well with a little elbow grease, a sharp putty knife,
and lots of acetone and rags. I'm ready to begin putting the trim back on. |
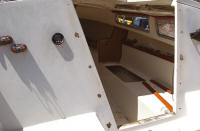 |
The spots around the companionway where the gelcoat ripped off down to fiberglass
matting with removal of the teak trim. I coated them with epoxy
yesterday to seal them -- the trim will cover the flaws when installed,
I hope. [Closeup
Detail]
[Companionway
before cleanup] |
|
Page 1 |
Back to Page 2 |
NEXT |
Page 5 |
|
Moving on
with Season 2008 improvements |
|
It's never-ending ...
but Sailing Season '08 is coming fast! |