 |
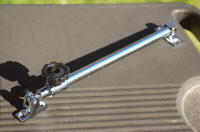
A most frustrating day. I got the hatch hinges
tightened, then moved on to installing the hatch adjusters. I had
both mounted to the deck frame flange then set out to attach them to the hatch itself. As I
attempted to align the port side adjuster to the hatch, it simply fell
off at its attachment point, apparently broken. Great, off to West
Marine for a replacement, which they didn't have. The gave me a
refund and sent me off to its franchise in Peabody where they reserved one
for me. As it was too late to make it there before the store closed, I
headed home to get back to work on the other. (Apr. 30, 2006) |
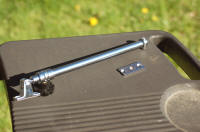 |
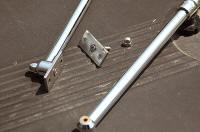
The flawed West Marine Hatch Adjuster,
model 592040.
Avoid at all cost! Above is a shot of how it's supposed to
look: to the left is how it looks broken. When I returned
from West Marine, I set out to attach the starboard side hatch adjuster
to the hatch. I aligned it to the hatch, drilled its holes, let
the adjuster pivot below on its deck flange pivot, and heard it hit the
cabin floor -- it too had broken! |
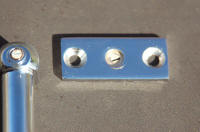 |
The base/foot where the hatch adjuster fastens to the
hatch deck
flange has a pin through its center on which the adjuster pivots, almost
like a key that seems to handle the pivoting. That's
where both broke, with no undo pressure whatsoever -- in fact, no
pressure or resistance whatsoever when the second one broke but for it
pivoting freely under its own weight. |
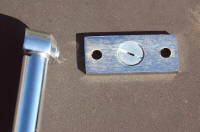 |
This is the backside of the attachment
foot which faces
the hatch deck flange. Note the round slotted coin-like circle in its center: this is its pivot point. I called West Marine
here in Marblehead and spoke to its owner, John. He thinks perhaps
there's a flaw in the design, or the lot. Wouldn't be the first
time I was the victim of a bad lot.
I remember too clearly still the Sea Dog deck connector fiasco, the
week-and-a-half of frustration and wasted time (and fuses) and how many
replacements before Sea Dog bench-tested, recognized. and acknowledged
that everything they had in stock was shorting out too! I ended up
going to an AquaSignal deck connector to make the mast lighting work. |
 |
On Monday, I got a refund on the second hatch adjuster
from West Marine, and they let me keep the two bad adjusters. I took
them to Mike at Fraser Welding over at the boatyard. I had a plan:
I left the two adjusters and instructions with him. (May 5, 2006)
|
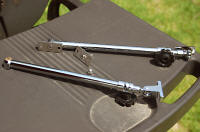 |
I had Mike drill out the ends of the adjusters where
they'd broken large enough to insert a 10/24 machine screw and make me
two new attachment bases, the center holes in each drilled and countersunk
from the back. |
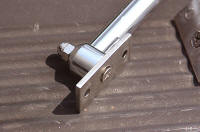 |
West Marine even gave me the additional hardware
free-of-charge to complete the job, the two SS machine screws and acorn
nuts. Completed, the new adjusters cost a total of $30/pair for
Mike to do his machine work -- not counting last Sunday's utter
aggravation. Beefed up this way, these should work. I'll install them tomorrow,
a week from when I started. |
 |
Yesterday was another frustrating one, getting the hatch
and adjusters to align so the hatch would close smoothly. I spent
far more time accomplishing that simple feat than anticipated, filling
one pair of holes on the hatch's starboard side before drilling a second
pair slightly more aft and fastening the second adjuster. The
hatch now opens and closes perfectly. This morning I tightened all
the screws and nuts into the bedding compound. Sure that
everything was working as intended, I patched the existing foam gasket
in places where I had to cut it away to get at hardware, then added a
new layer of wide closed-cell weatherstrip on top of it. (May 7, 2006) |
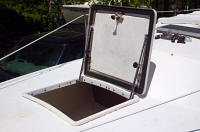 |
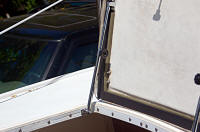
The hatch with its adjusters finally
installed; the project is near-completed. All that remains to be
done is attach hatch dogs: I decided to remove the one in the
center and go with two, one on each side.
To see large file size (3.3 mb) detailed photo
click here.
The next day, the
New England Monsoon Season
struck . . . |
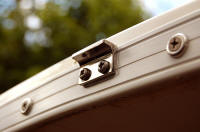 |
With new hatch dogs still back-ordered from
Catalina Direct after three weeks, and with the launch already behind
schedule, I decided to make do with what I have. I drew up a hasty
"blueprint" and brought it down to Fraser Welding at the boatyard.
Mike built me a piece that I thought would work just fine as a catch -- at least
for now -- with the existing single hatch dog. Boy, am I ever glad
I waited to remove it! (Jun. 2, 2006) |
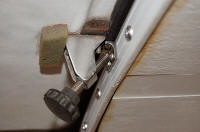 |
The old hatch dog with the new catch. It tightens
down the hatch all around nicely; better than I'd anticipated. I got it in just before another
weekend of rain struck, and everything is dry inside today. This
looks like the final solution; I cancelled my Catalina Direct order. (Jun.
5, 2006) |
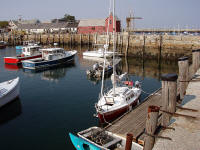 |
I've been appreciating and enjoying that forward hatch
ever since. On the left is a photo of Chip Ahoy docked in Rockport
Harbor (MA) on Sep. 7, 2007 with it open and sucking in air. What
a difference from before. How did I last so long in "the cavern"
without flow-thru ventilation? --
SEE CLOSE UP
-- |
 |
In the spring of 2008 I fabricated and added a removable screen
in the cabin beneath the
opening. (May 24, 2008)
See:
The Forward Hatch Screen Project |
See Update (2010):
Adding additional
weatherstripping
Continue on to Update (2012):
Renewing the hatch seal |
|
Page 1
|
Back to Page 2
| NEXT |
Page 5 |
|
Some projects really are never-ending ... |